Since the iPhone 12 Pro, every Pro-model iPhone (and every iPad Pro since 2020) has shipped with a LiDAR scanner — a small sensor next to the camera that fires invisible laser pulses and times their reflections. It was built for photography and AR, but it happens to be a superb surveying tool: it can map the geometry of a room in seconds, accurate to within a few centimeters.
That means the fastest way to make a floor plan today isn't a tape measure or a laser rangefinder — it's the phone already in your pocket. Here's how to do it well.
What you'll need
- An iPhone with LiDAR: iPhone 12 Pro or newer Pro model, or an iPad Pro from 2020 onward. (No LiDAR? See measuring with AR instead.)
- Floor Plan App — free, no account needed.
- About one minute per room.
Step 1: Start the scan
Open the app and tap Start Scanning. Hold the phone at chest height, slightly tilted, so the camera sees where walls meet the floor. That wall–floor edge is the strongest signal the scanner has for finding the room's outline.
Step 2: Walk the room slowly
Move along the walls at a slow walking pace, sweeping the phone gently from side to side. A few habits make a big difference:
- Slow beats thorough. LiDAR fills in gaps quickly, but fast motion blurs the tracking. If you only change one habit, walk slower.
- Catch every corner. Pause briefly at each corner of the room so it registers crisply.
- Sweep doorways and windows. Give each opening a deliberate pass — they're detected automatically and placed on the plan.
- Don't chase furniture. Large items like beds, sofas, and storage are recognized as objects and added to the plan on their own.
Step 3: Review the plan
Finish the scan and the app converts the capture into a clean 2D floor plan: walls squared, doors and windows placed, and every room automatically sized and labelled — living room, kitchen, bedrooms, with square footage on each.
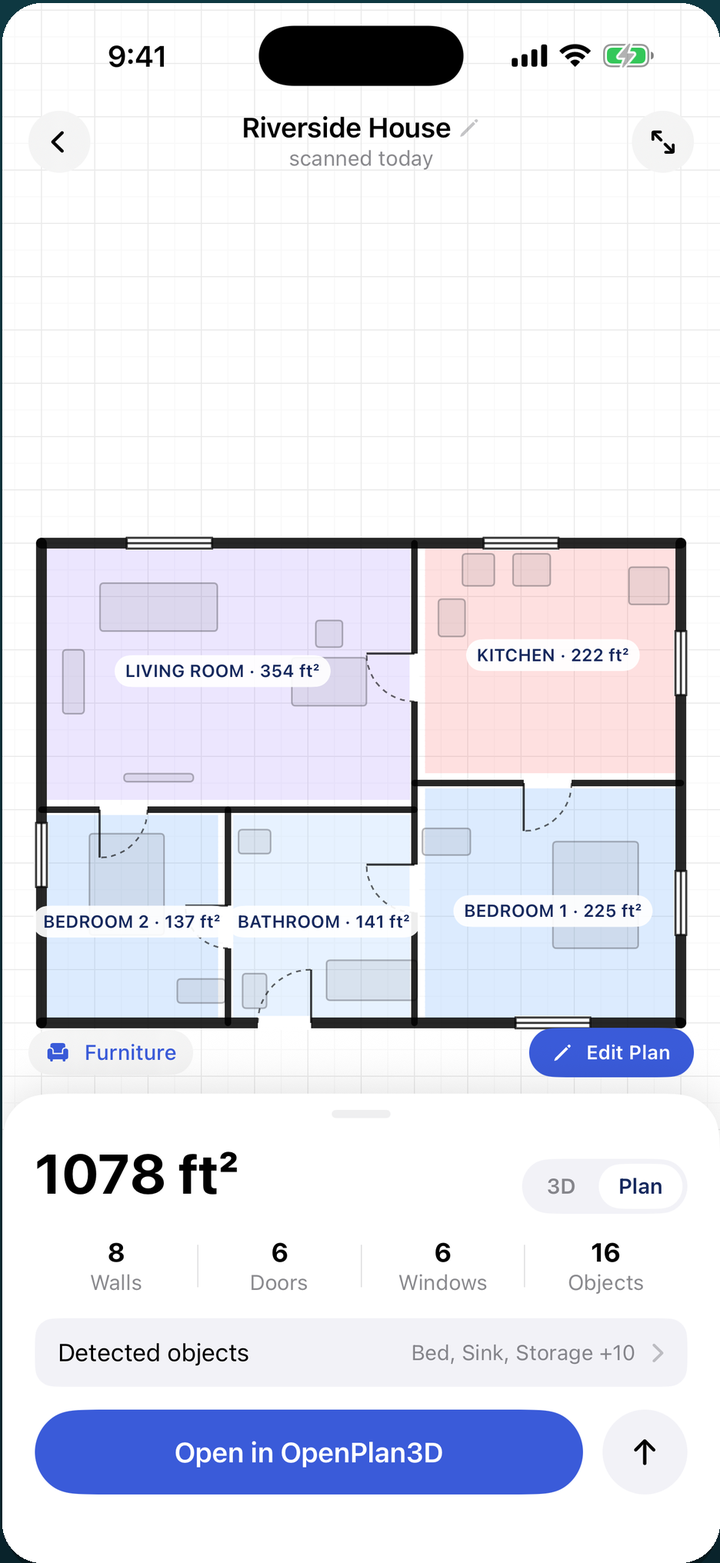
Check the totals card at the bottom: wall count, doors, windows, and detected objects. If a wall came out slightly off — it happens with mirrors and floor-to-ceiling glass — tap Edit Plan and drag it into place. Measurements update live.
Step 4: Export or go 3D
From here you can export the plan as a PDF, SVG, or image, or flip the toggle to view it as an interactive 3D model — useful for walking a client or contractor through the space remotely.
Tips for tricky rooms
- Mirrors and glass confuse any LiDAR sensor — the laser goes through or bounces oddly. Scan those walls from an angle, and verify them in the editor.
- Very dark rooms are fine for LiDAR itself, but the camera tracking wants some light. Turn the lights on.
- Long hallways track better if you keep a wall in view rather than pointing straight down the empty corridor.
- Multi-room scans: walk through doorways slowly and let each new room build up before moving on.
Try it on your next room
Floor Plan App is free on iPhone and iPad — scan with LiDAR, measure in AR, or draw by hand. No sign-up.
